Create and manage custom apps
A custom app is required to generate an API key in order to use any of Attentive’s APIs. After you’ve generated an API key, you can use the /me endpoint to test that you are authenticating correctly. You should treat your API key as a password and keep it secure. If it is accidentally shared, other users may be able to send messages to customers on your behalf.
After you’ve created a custom app, you can manage your API keys on the App Marketplace page. If you’d like to make your app publicly available for others to use, see Distribute your app.
See the following sections for details:
- Create a custom app
- Edit your custom app
- Regenerate an API key for your custom app
- Delete your custom app
Create a custom app
Complete the following steps to create a custom app for your account:
- Navigate to the integrations setup page.
- Click + Create App in the top-right corner.
- Enter a unique name for your app in the App name field.
- Enter your email address in the Contact email field.
This allows Attentive to contact you if there are any issues. -
Edit the Permissions (No Access or Write) for the following APIs (by default, all APIs have No Access selected):
- Custom Attributes—Select the permissions for the Custom Attributes API.
- Custom Events—Select the permissions for the Custom Events API.
- eCommerce—Select the permissions for the eCommerce API.
- Privacy Request-Select the permissions for the Privacy Request API.
- Product Catalog-Select the permissions for the Product Catalog API
- Subscribers—Select the permissions for the Subscribers API.
- Click Create.
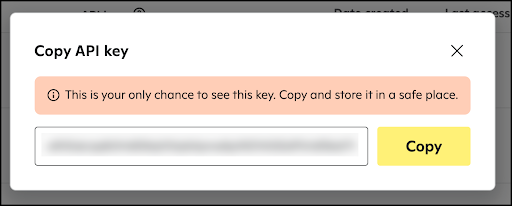
The Copy API key modal appears.
-
Click Copy to copy the unique API key to your clipboard.
- Important! This is the only time you will be able to copy this API key.
- Click X to exit the modal after you’ve saved your API key.
The name and distribution status of your custom app now appear on the App Marketplace page on the Built by you tab.
Edit your custom app
Complete the following steps to edit an existing custom app on your account:
- Navigate to the integrations setup page.
- Go to the Built by you tab.
- Click the name of your custom app.
Your custom app appears in edit mode. - Edit any of the custom app's fields, as necessary.
Note that the API key is the only field that you can't edit. - Click Save.
The custom app is now updated with your change.
Regenerate an API key for your custom app
Complete the following steps to regenerate an API key for an existing custom app on your account:
- Navigate to the integrations setup page.
- Go to the Built by you tab.
- Click the name of your custom app.
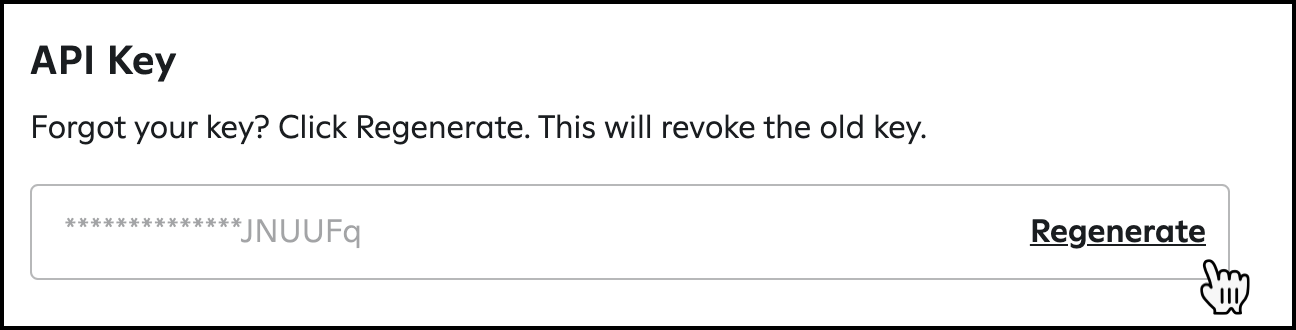
- Scroll to the API key section and click Regenerate.
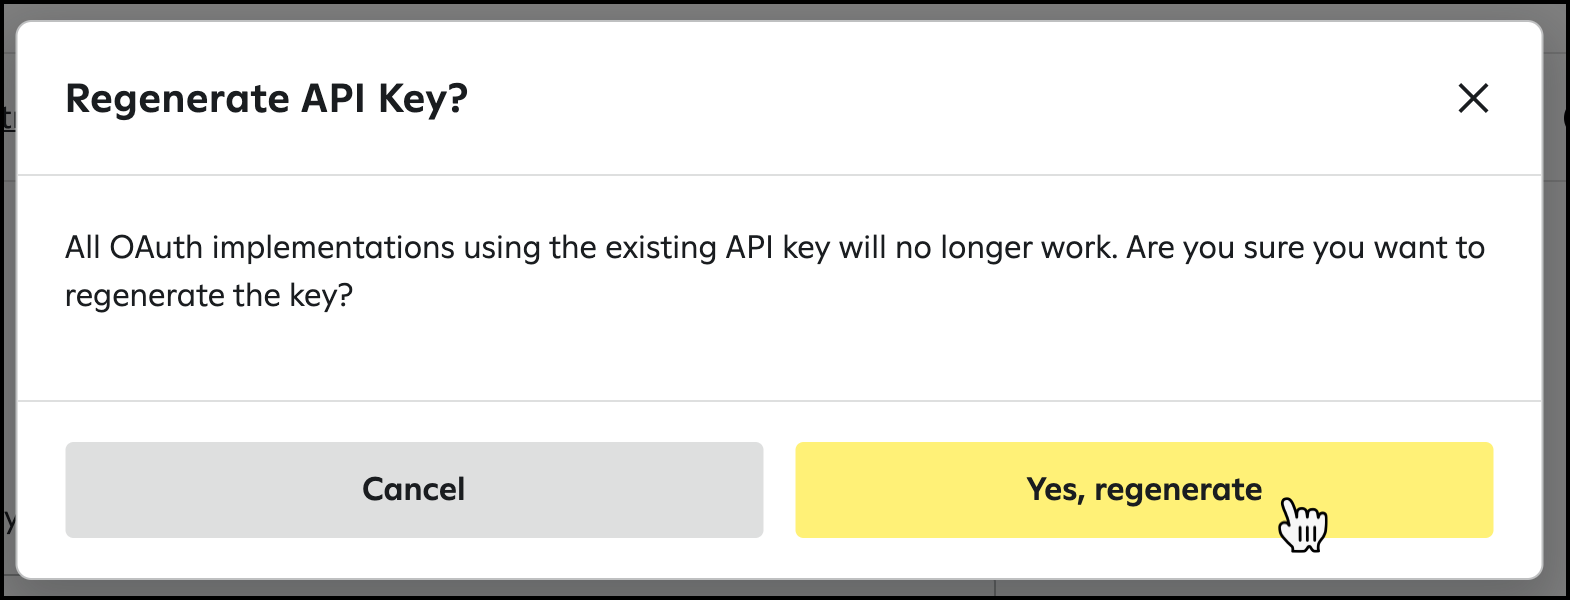
The Regenerate API Key? modal appears to confirm that you want to regenerate a new API key for this custom app. - Click Yes, regenerate.
The Copy API key modal appears. -
Click Copy to copy the unique API key to your clipboard.
- Important! This is the only time you will be able to copy this API key.
- Important! This is the only time you will be able to copy this API key.
- Click X to exit the modal after you’ve saved your API key. \
Important! Regenerating an API key only affects the key itself and requires updating your integrations. It doesn’t delete the app. Deleting the app (see Delete your custom app section below) is a separate, permanent action that will disconnect associated journeys.
Delete your custom app
Complete the following steps to delete an existing custom app on your account:
- Navigate to the integrations setup page.
- Go to the Built by you tab.
- Click the name of your custom app.
- Scroll to the bottom of the page and click Delete app.
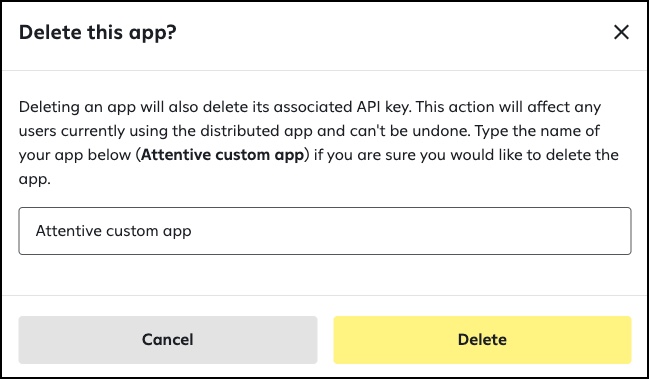
The Delete this app? modal appears to confirm that you want to delete your custom app.
Important! Use caution when selecting this option, as it can't be undone. Beyond deleting the API key, deleting the app will also permanently disconnect any custom event journeys triggered by the app. These journeys will stop working and can’t be reconnected, even if you create a new app later. You’ll need to create entirely new journeys linked to the new app. - Enter the name of the app and click Delete.
The custom app is deleted and removed from the App Marketplace page.