Publish your app
After you configure your app’s settings and you set it up for distribution, the last step is to fill out the Publish app page. Only fill out the Publish app tab if you want your app to be publicly available to all of Attentive's customers. Once the listing is approved by Attentive, it is made available in the Attentive marketplace.
Prerequisites
Before you begin, make sure that you created a custom app in the Attentive platform and enabled it for distribution. Your app should appear with an Unlisted status in the Marketplace tab.
Add and submit your app listing
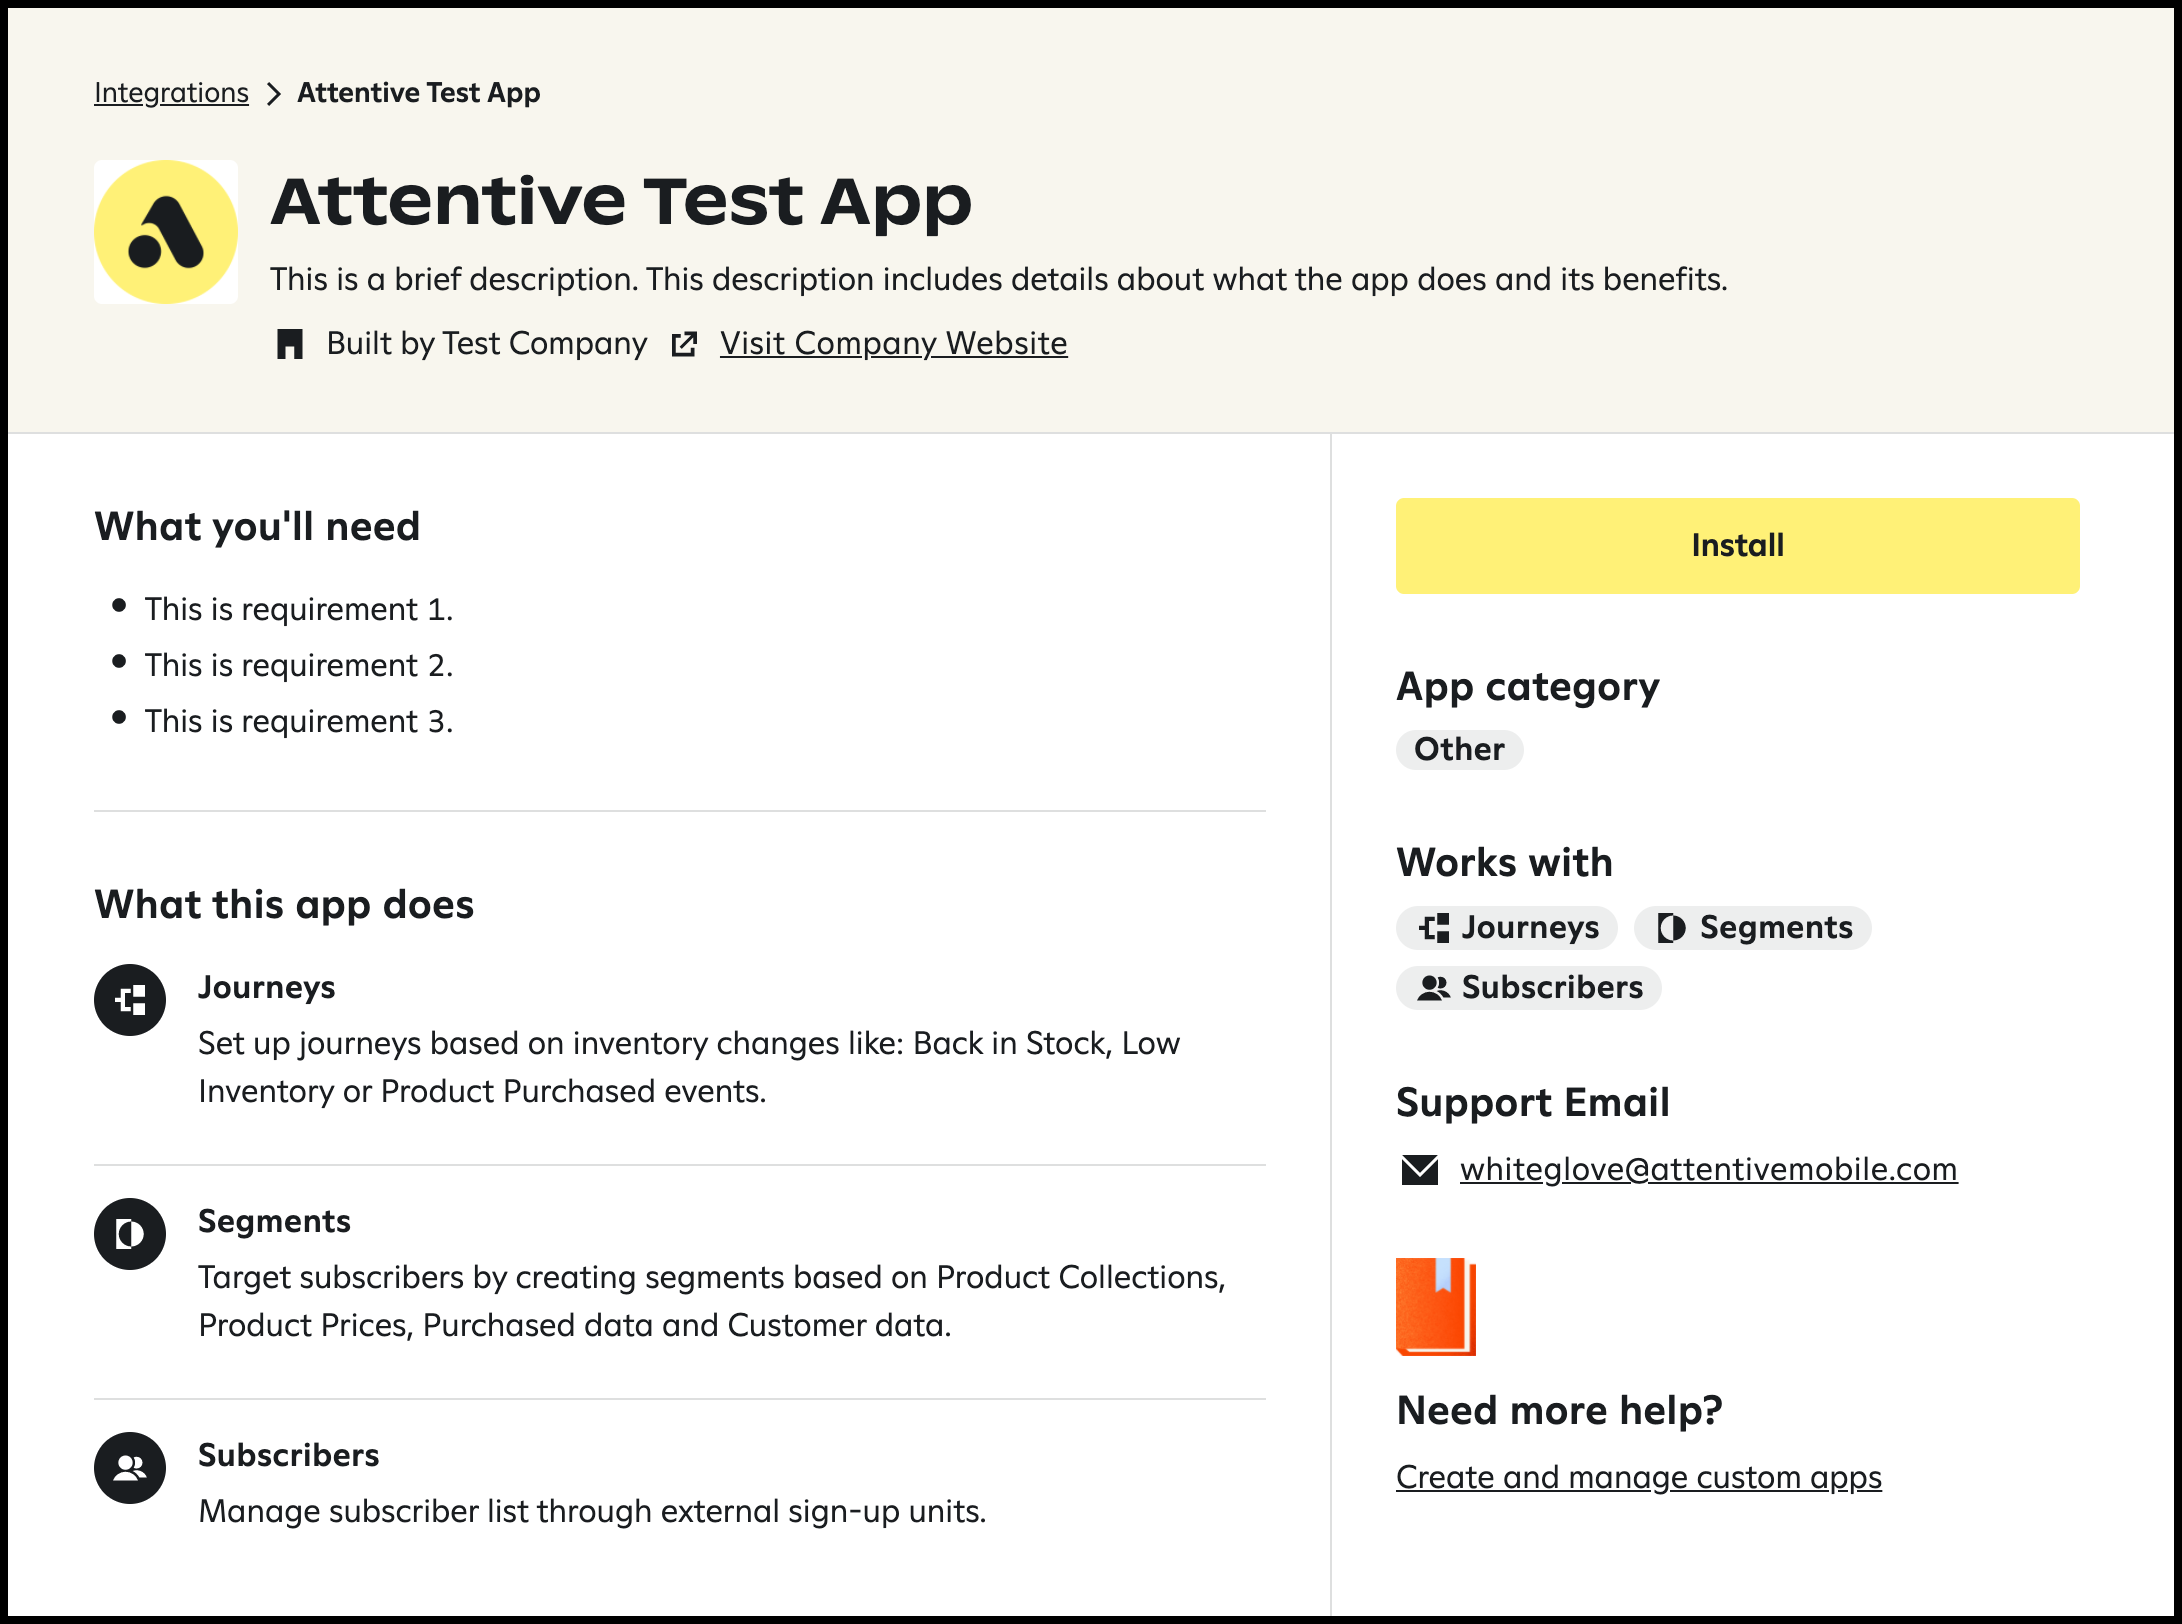
Complete the following steps to submit your app for publication (please refer to this listing as a good example of an app listing):
- Navigate to the integrations setup page.
- Scroll to the Built by you section and click the name of your unlisted app.
- Click the Publish app tab.

The publish app page appears in edit mode for you to enter details about your app.
- App icon: click Upload app icon and select an image that is 256px by 256px in PNG or JPG file format. This icon appears in Attentive’s marketplace and throughout the platform to represent your app.
- Short description: enter a short description to explain what your app does (max 90 characters).
- Long description: include a description of your app and how joint customers can get value from your integration. Describe features and benefits as well as highlight key uses cases (max 500 characters).
-
App category: click the drop-down and select one of the following options that represents your platform:
- Analytics
- Automation
- Customer data platform
- Customer service provider
- eCommerce platform
- Email service provider
- Loyalty
- Reviews / UGC
- Shipping / Returns
- Other
- Company URL: enter your company URL to provide a link to your company’s website in the app listing.
- Support email: enter a support email so that users can contact your support team for any questions or issues with the integration.
- Sales email: enter a sales email so that users can contact your sales team to inquire about working with you.
- Install URL (optional): enter the Install URL. This URL must eventually route to the Distribution URL that you previously generated for your app. If this field is omitted, users are automatically directed to the app’s distribution URL during the installation process.
- What you'll need: click + and enter a requirement for setting up the integration. For example, you can add the subscription type or account that a user must have.
-
What this app does: select one or more of the following Attentive features that the app can support:
- Journeys
- Segments
- Subscribers
- Privacy
-
Depending on which feature(s) you selected in the previous step, enter a description in the following fields:
- Journeys description
- Segments description
- Subscribers description
- Privacy description
-
Documentation links: click + Add link and enter the following details:
- Help article name
- Help article URL
- Submit integration document template: click the integration document template link and use the Partner integration template to create and share a new document (e.g., a Google doc) with your information. Enter the location of the shared document in the Link URL field.
- Click Save.
- Save preview (optional): click Preview to preview your app listing in a new tab, as shown in the following example:
- Click Submit. A window appears to confirm that you submitted your app and an email notification is sent to the contact email that is listed in the Settings tab of your app. You can update your app listing at any time, just be sure to click Save to save any changes and our team gets notified.
Our team will review your app and contact you if we have any questions. Once approved, your app is publicly available in the Attentive marketplace.